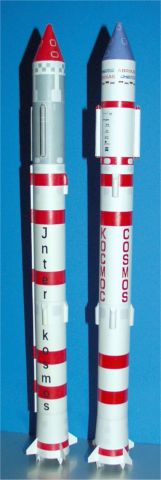
Cosmos 3M / C-1 / SL-8 / 11K65M launch vehicle model
1:96 scale

首先下載
http://zili.de/pap...l8.pdf或
http://zili.de/pap...l8a.pdf
Then, print on an A4 sized sheet of about 120 gsm (or letter around 6 mils thick) medium weight paper - the model plan is sized to fit on both paper formats equally. Do not check "fit to page" or use another scale than 100%, unless you want to build the rocket model in another scale than 1:96. You can magnify or reduce to nearly every possible scale without quality loss, because the model plan is made using a vector drawing software. Example: For a 1:144 model simply print in 67% scale.
Glue parts A, B, and C into cylinders, and part D into a cone (see big drawing); form there a rounded tip. If you want a tighter fit with less visible seams, remove the tabs, and use paper strips as connectors. But that is not really necessary, because most seams are covered later by parts I and J.
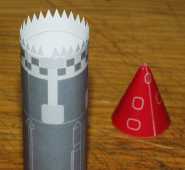
Photo: nose cone mounting
Same procedure for part E (engine section), but please don't forget to cut out the four slots, which are needed for fitting the tail fins.
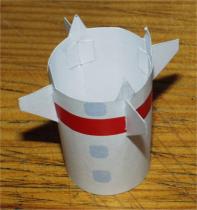
Cut out the four fins (parts F), fold them, stick them through the prescribed slots in part E, and glue them from inside to that section (see photo).
Now is the moment to connect the five sections - beginning from top - to build the rocket body. Use the provided connectors for that purpose. Alternatively, if you want a sturdier rocket body, roll a sheet of paper into a cylinder, and use that as connector for the sections, instead - its length will fit exactly.
Next part to cut out is the Base plate (G). Score and fold it, like to be seen in photo. Then glue it flat into the tail section to give a fitting rim of about 1/16 inch height.

Photo: Base plate
Finally cut out the rudder vanes (H), score, fold and glue them into their position (see photo).
The following - optional - parts are for refining/detailing the model - they are in beta phase not finished yet. There are the cable channels (parts I and J), as well as the four half-rounded parts K and finally L and M for the upper stage section - the mounting positions should be clearly visible in the drawing and on the model itself :-)
其他圖